How to Put WordPress in Maintenance Mode
A maintenance mode provides a nice experience to visitors while potentially-dangerous administrative tasks are being done.
Maintenance mode
Put your website in maintenance mode when you need to do administrative tasks that may damage the normal behavior of the website, like replacing a critical plugin. If maintenance mode is on, each time a web page is accessed, visitors are informed that the website is under maintenance.
Note that WordPress puts your website in maintenance mode automatically during updates. For all other cases, the recommended method is to use a plugin.
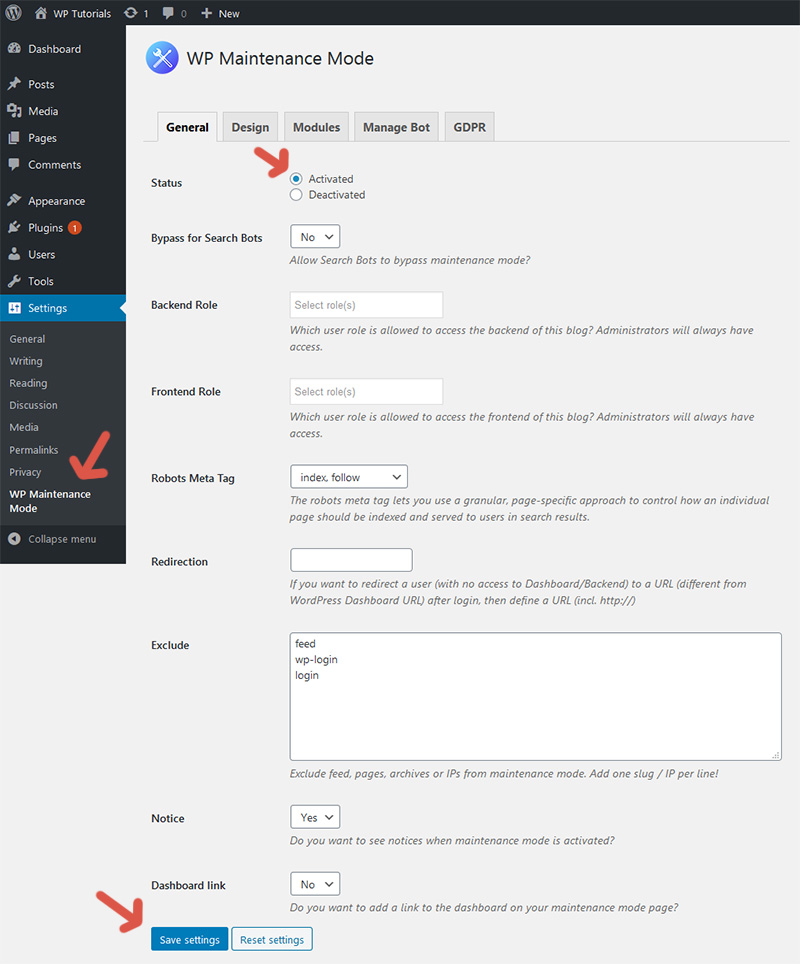
Activate maintenance mode
My preferred plugin to put a WordPress website in maintenance mode is WP Maintenance Mode.
Step 1: Install and activate the plugin WP Maintenance Mode.
Step 2: Navigate to Settings > WP Maintenance Mode to open the plugin settings.
Step 3: Set the status to Activated, click Save Changes, and the plugin will put your website in maintenance mode using the default settings. However, I recommend taking a look at the settings in each tab.
Step 4: Log out and visit your website to check how it looks in maintenance mode. For example, I created the following screen in two minutes.

Deactivate maintenance mode
To deactivate maintenance mode, open the plugin settings, set the status to Deactivated, and click Save Changes. If desired, deactivate the plugin too. If you activate it later, all your customizations will be there.
I do not recommend uninstalling the plugin, because if you need to put your website in maintenance mode again, you will need to redo all your work.

Comments