How to Migrate a WordPress Website Using Duplicator
Duplicator is a robust plugin to migrate WordPress websites.
Background
Sometimes we need to deploy a copy of a website to a different place, like a new domain or a development environment. Duplicator is a popular backup and migration plugin that reduces this task to two steps:
Step 1: Create a backup of the origin website.
Step 2: Restore the backup to the destination website.
Backups
Backups created by Duplicator are made of a package and an installer file. The package is a ZIP file containing all website parts. The installer file is a PHP file that allows us to install the package at any location capable of running WordPress.
An advantage of Duplicator over similar plugins is that it includes WordPress Core files in the backup, thus the backup is an exact copy of the website.
Prerequisites
This tutorial assumes that Duplicator is installed and active on the origin website. You do not need to install WordPress on the destination website.
During the restoration, Duplicator installs the WordPress version contained in the package. You only need to provide the credentials of a database user and a database name.
Origin
Follow these steps to create a backup of the origin website using Duplicator.
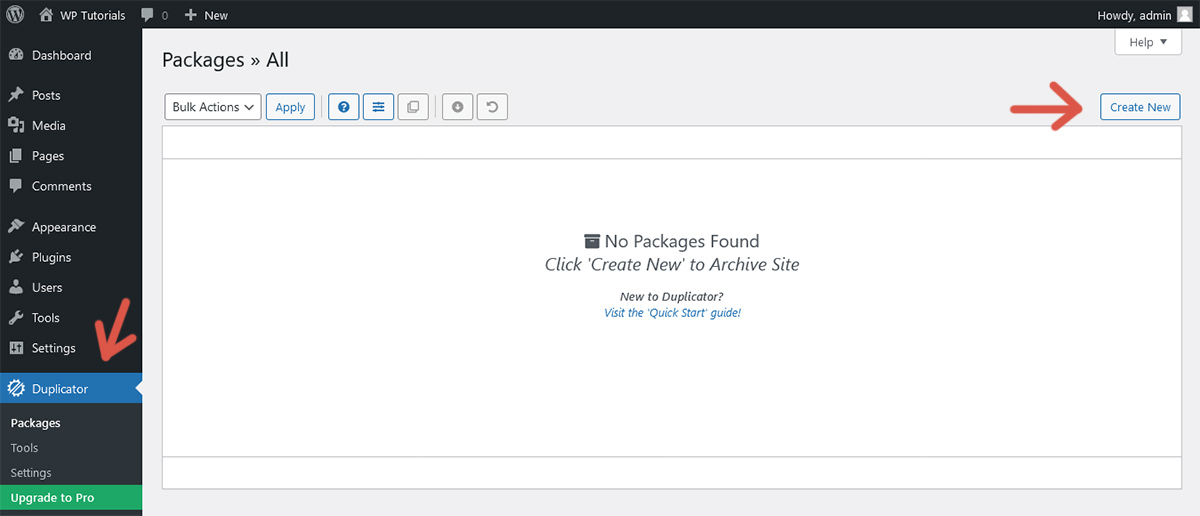
Step 1: Click Duplicator and then click Create New.
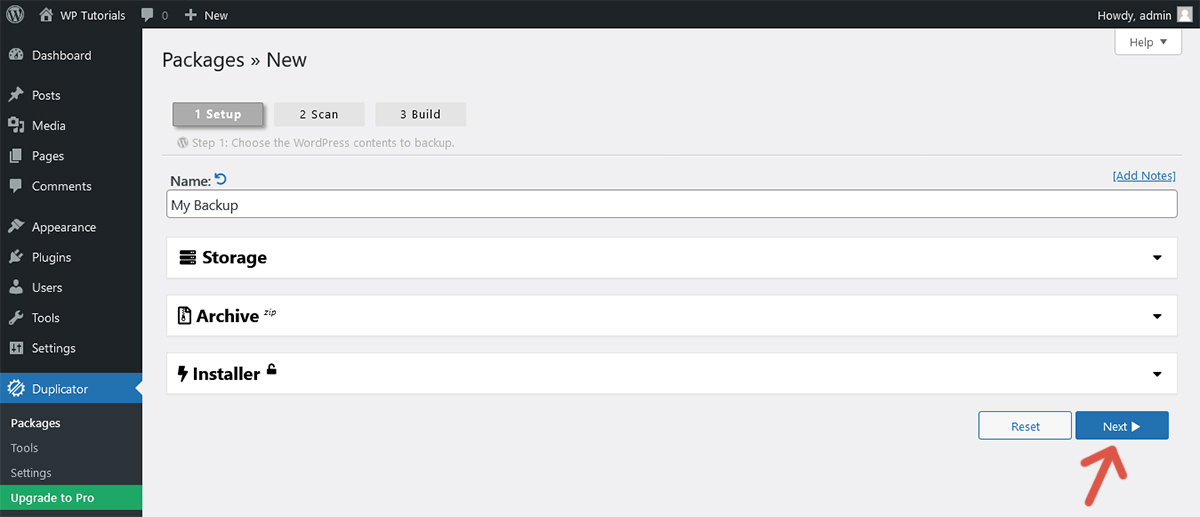
Step 2: The default configuration is to create a full backup. Adjust each setting as desired and click Next.
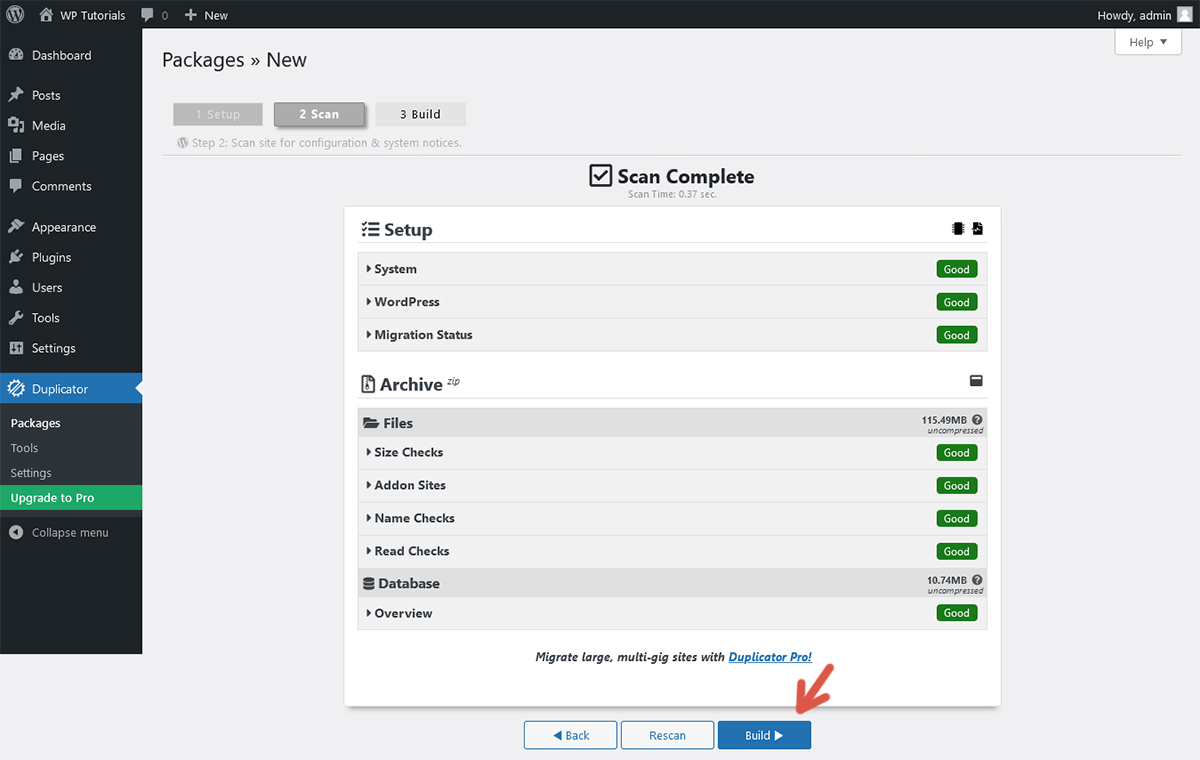
Step 3: Duplicator does a quick scan to detect issues. Fix found issues, if any, and click Build.
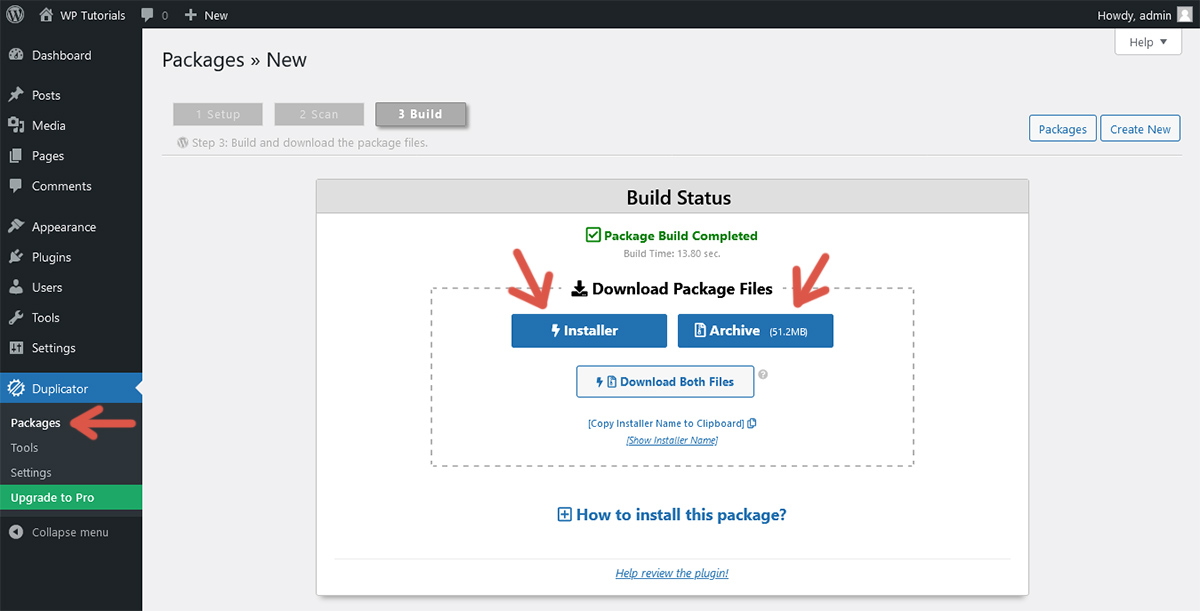
Step 4: Wait until the build finishes. Duplicator adds the new backup to the Packages screen and shows buttons to download the installer file and the package.
Duplicator stores backups in the folder wp-content/backups-dup-lite.
Destination
Follow these steps to restore to the destination website the backup created previously.
Step 1: Use FTP or cPanel to upload the package and the installer file to the website root directory.
Step 2: Go to the address bar of the web browser, type the URL of the installer file, and press Enter. This URL is something like https://example.com/installer.php.
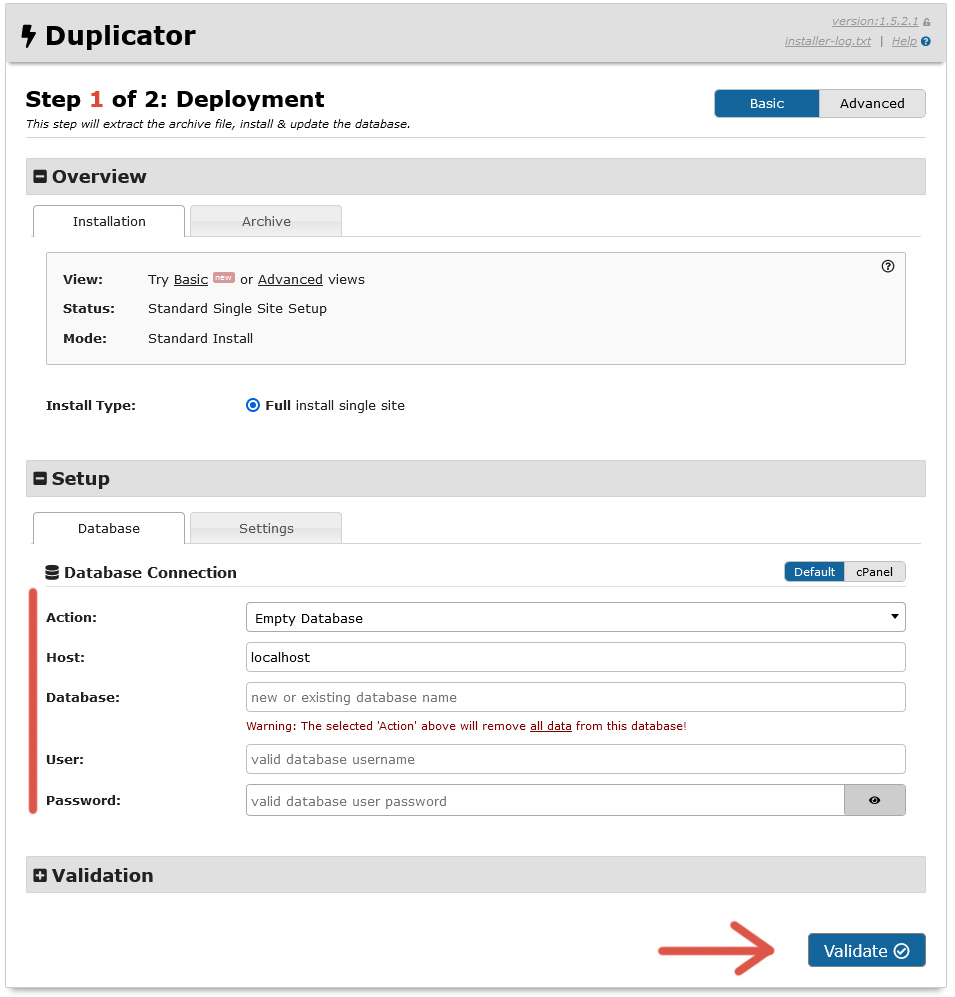
Step 3: A wizard appears. Set up the database connection and click Validate.
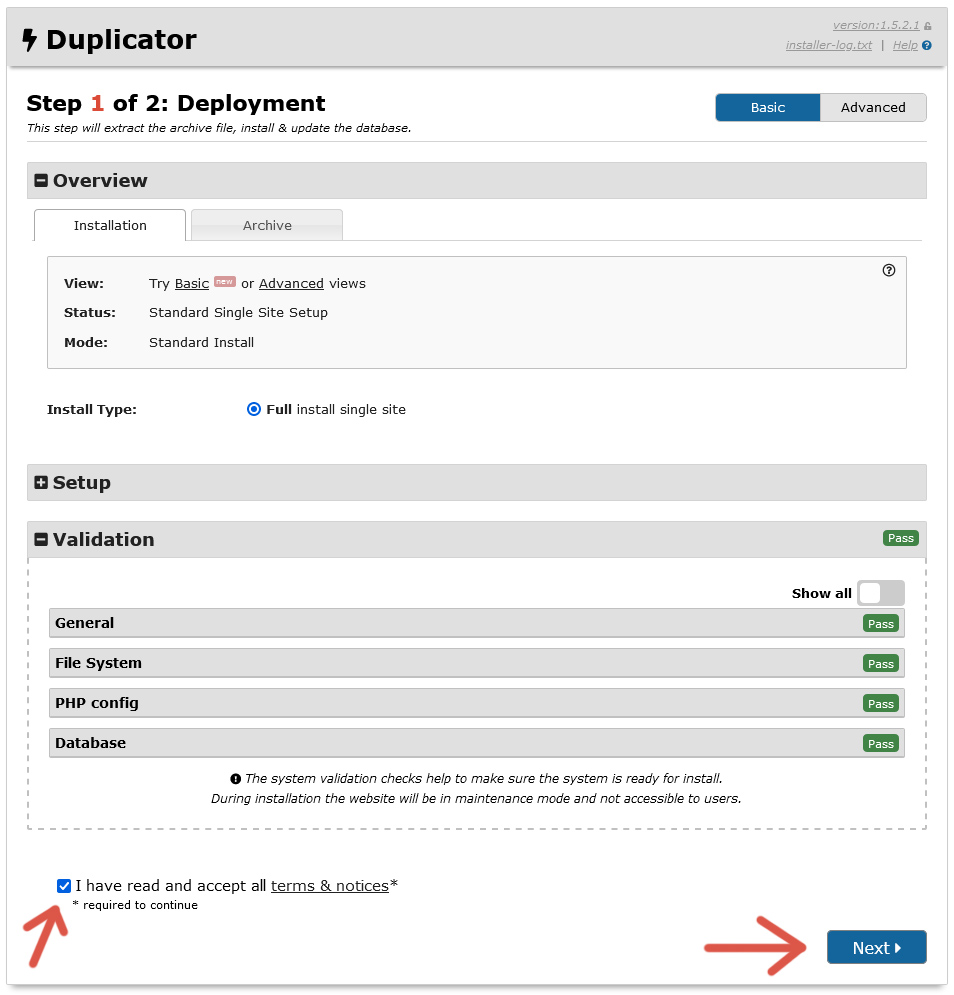
Step 4: After the validation completes, give your consent to continue and click Next.
Step 5: Double-check each value on the confirmation screen and click OK.
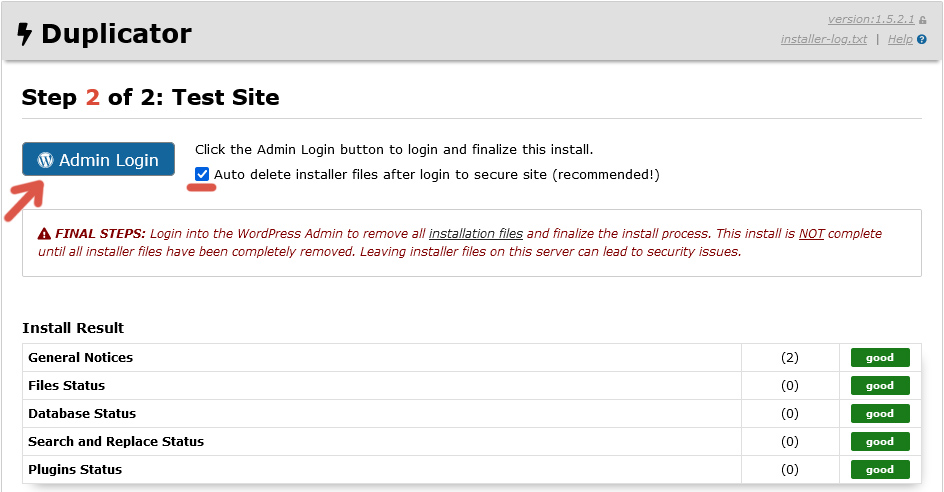
Step 6: Wait until the restoration is finished. Keep checked Auto delete installer files after login. Click Admin Login to access your website and verify that it is an exact copy of the origin website.
Further reading
I recommend the other tutorials in this series to learn more about the plugin Duplicator.
Comments